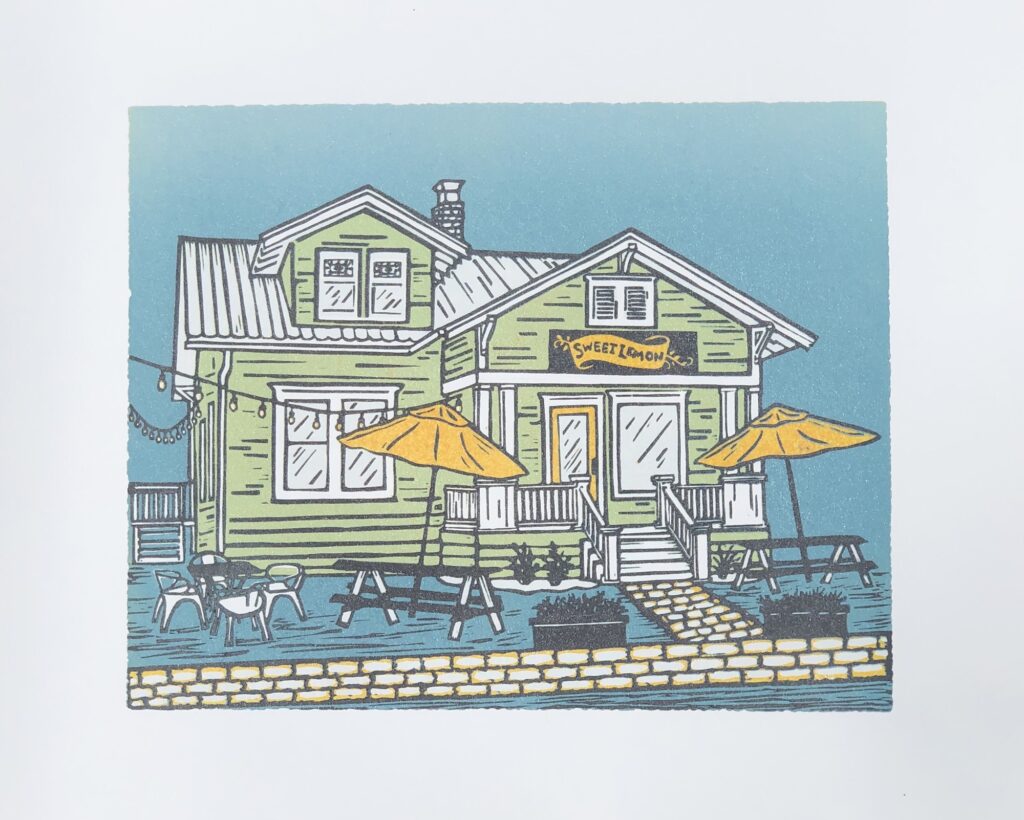
Last month I released this five layer reduction print featuring one of my favorite small businesses in Georgetown: Sweet Lemon Kitchen. The process of creating a print like this can be a little confusing if you’ve never seen it before, so I decided to share a little more about how this print was made!


Reduction printing is one of the methods printmakers use to create multicolored prints. In reduction printing, a single block is printed multiple times and more of the block is carved away between the printing of each layer of color. Another method of creating a multicolor print is to carve multiple printing blocks – one plate for each color in the print.

When a print is created using multiple blocks for each color, the print can be created again and again. In reduction printing, you’re carving the same block to create each new layer. Once a layer is printed, the block is carved again and the previous layer is destroyed. Prints created using this method are very limited edition because they cannot ever be reprinted since each layer of the block has been carved away during the printing process.

Reduction printing can be a long process. It takes a lot of planning before you can begin since each cut has to be precise. Every paper in the edition is prepared for printing by aligning it in a registration jig and adding tabs which will fit over pins on the jig to ensure the print is perfectly aligned with the block during printing. Mixing ink colors, carving each layer, printing every color by hand, and waiting for ink to dry are all part of the lengthy process. These editions typically take me about a month to create.
Here’s a quick video about how my Sweet Lemon Kitchen reduction print was made! You can see little clips of most parts of the process.


I’ve always loved puzzles and figuring out how things work, so reduction printing is totally fascinating and super fun for me! It is so exciting to see a print finally come together!
Sweet Lemon Kitchen – Hand Carved Linocut Print
Ships free in 1-3 business days!
I hope you enjoyed this post about how my print was made! If you would like to learn how to create your own linocut prints, be sure to check out my workshops page! Join my next class or book a private workshop for yourself and a few friends!
Leave a Reply